Desc

Random mixtures of sugar and colors to entice your taste buds!

Have a "How to" question? Email them to shivssweetdelights@gmail.com

Friday, September 7, 2012

How to prepare fondant?

For all cakers, making fondant is one challenge. Getting the right consistency and texture is indeed a difficult task. But it can be made easy with the right steps!

Thanks to Shraddha rai, here comes a post on how to make fondant.

This was a recipe that I got from some online site a year ago and made modifications as needed! and it sure works fine!

The total preparation time is approximately 10 hours and the prepared fondant covers a 9-inch x 4 inch cake.

Ingredients:

    2 pounds confectioner's sugar, sifted
    1/4 cup cold water
    1 tablespoon unflavored gelatin
    1/2 cup glucose or white corn syrup
    1 1/2 tablespoons glycerine
    1 teaspoon desired flavoring. Note: Color might change as per the flavoring.
    Cornstarch

Preparation Steps:

1. Add the water in a small pan and sprinkle the gelatin on top to soften for about 5 minutes.

2. Begin to heat the mixture and stir until the gelatin is dissolved and clear. Do not boil. Turn off the heat and add the glucose and glycerine, stirring until well blended. Add the flavoring.

3. In a large bowl, add the sifted sugar and create a well in the center.

4. Pour the water and gelatin mixture into the well of sugar, and mix until all of the sugar is blended.

5. Use hands to knead icing until it becomes stiff. Add small amounts of confectioner's sugar if the mixture is sticky.

6. Form the mixture into a ball and wrap tightly in plastic wrap. Place in an airtight container.

This icing works best if allowed to rest at room temperature for about 9-10 hours before using, particularly if the weather is humid. Do not refrigerate.

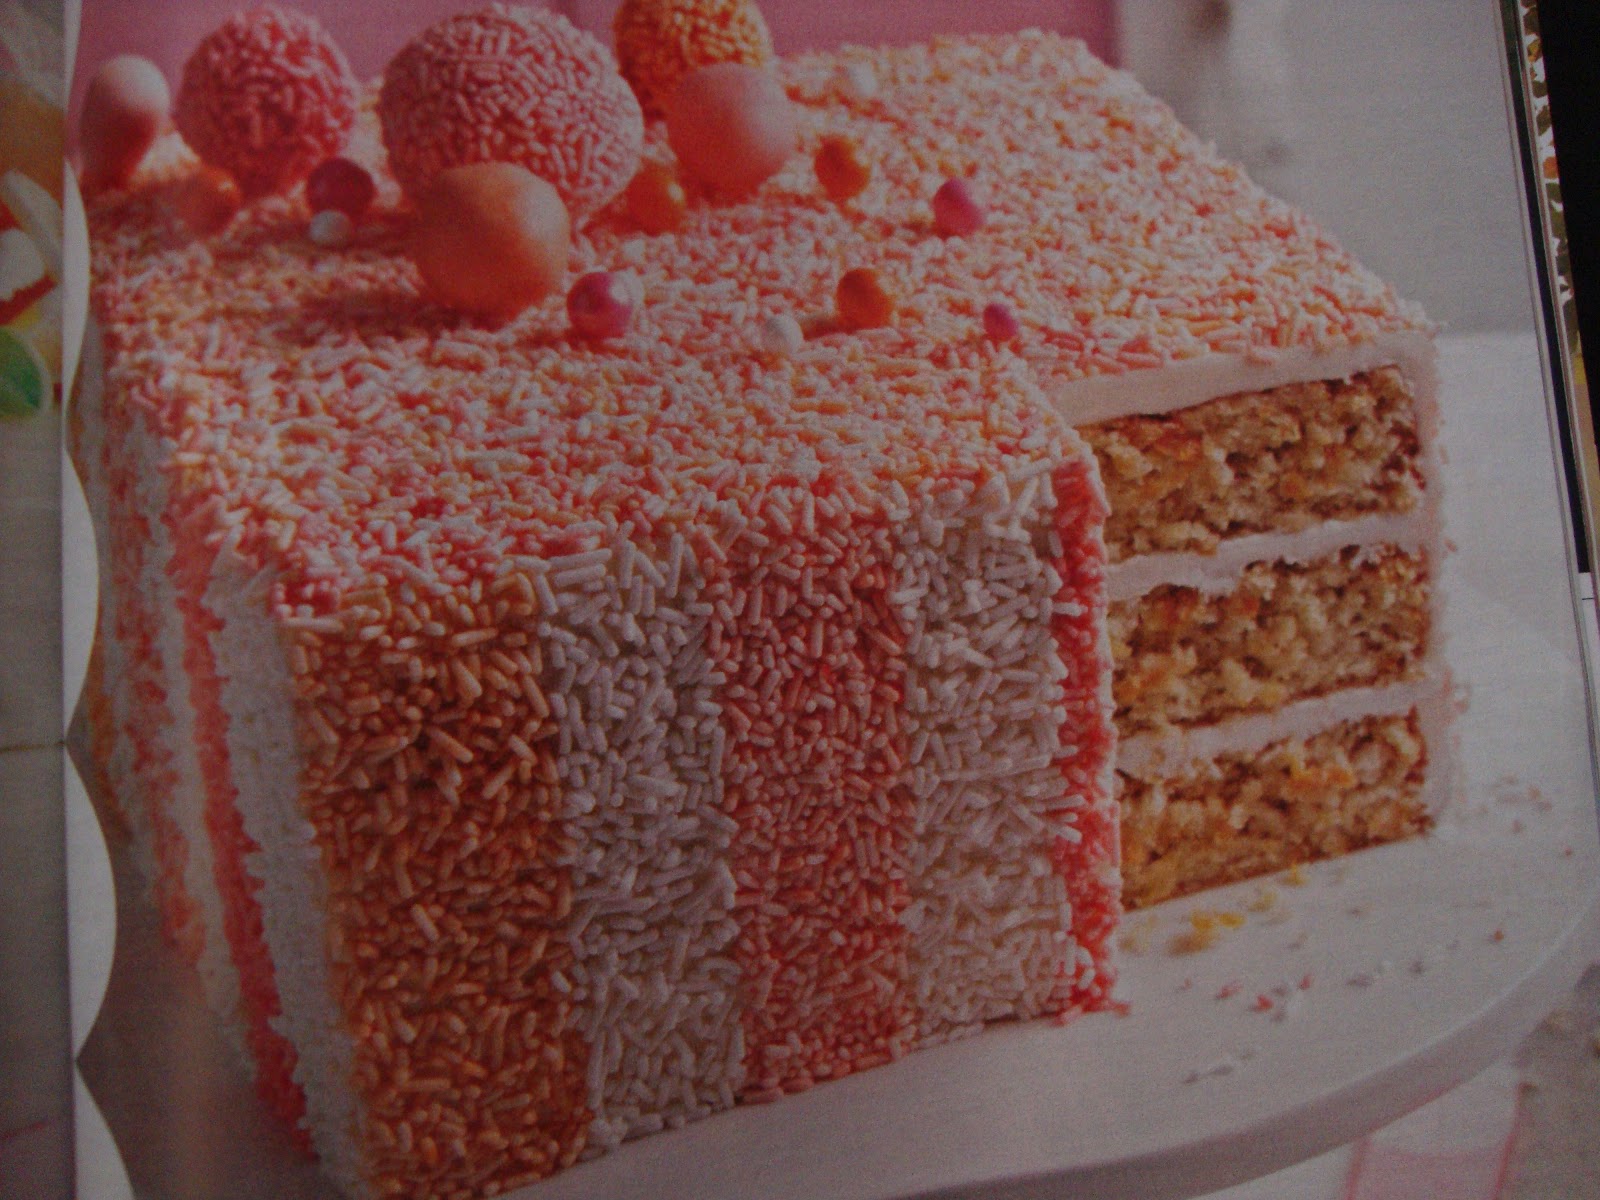
And here is one of my fondant cakes!


Hope this helps!


Tuesday, August 28, 2012

Tip of the week - Piping Tips

Piping is one of the main arts in cake decorating and the number of tips a decorator uses is endless. Getting to know the design for each tip is indeed a herculean task. So when i came across this article, I knew I had to share it with my fellow cakers!

Piping Tips

Read and enjoy caking!


Wednesday, May 23, 2012

How to use the Wilton Fondant (or) Gum paste Tool set

Working with fondant is something that I have started to like over the past few months of handling it and of course gum paste has become a favorite once I learned the art of making sugar flowers.

I have almost all the tools from Wilton used for working with fondant and gum paste. Quite recently my attention fell upon the 10 piece Fondant and gum paste tool set. Exploring all the tools in the set made me realize that I did not know the exact purpose of each tool. If I really wanted to master fondant, I should at least know what each tool is and what it does. I started exploring and here are the results! :)


Lets start from the left.

1. Palette Knife - This is used to cut shapes of your decoration out of the gum paste and fondant. It also can be used for easy lifting of large decorations.  It helps you position flowers in tight areas.

2. Thick and thin modeling sticks - These are the blue sticks with thin and thick points, used for frilling and ruffling petals and leaves; also use as small rolling pins for small amounts of gum paste. You can also wrap pieces of gum paste around the modeling sticks to form tubes or curved flowers.

3. Veining tool with large tip and small tip - This tool adds detail to gum paste leaves and flowers. It acts like a pen to carve into the surface of the decorations. It can also be used to make thin or wide veins on leaves and flowers.

4. Shell tool with knife on opposite end - The shell tool is used to make impressions on borders and to add texture to your gum paste decorations. The knife can be used to trim petals and leaves.

5. Dog bone tool with large tip and small tip - This is used to cup flower centers for a more open look and is used to shape and soften flower petals (like filler flowers). Also used to shape and create flowers, soften the petal edges by pressing the rounded end of the dog bone tool around the petal shape.

6.  Wheel tool with quilting wheel tip and cutting wheel tip - The quilting tip makes quilt stitches on fondant. It makes a pretty pattern on the gum paste petals. The cutting wheel is great for cutting stripes of gum paste or fondant with.

7. Umbrella tool with 6-division side and 5-division side - This tool is used to add detail to flower throats and tops of buds. You can also create flower petals by spearing the desired side of tool (5-sided or 6-sided end) into top of fondant bud on florist wire. Use knife tool to cut desired amount of petals.

8. Cone tool with serrated on opposite end - The cone tool helps you hollow out flower centers for your stamen placement and tops of buds. After petals have been formed on flowers, spear center of flower with serrated side of tool to create natural-looking centers. Use cone side to create larger well in center of flower. The serrated end is used to emboss a star pattern or mark divisions in tubular flowers. It also adds veining and dot details.

9. Ball tool with large tip and small tip - This tool is great for cupping and smoothing any size gum paste or fondant petal with out tearing. It thins the edges of gum paste leaves and petals.

As I find more uses for the above tool, I will keep updating here. Hope this post is useful for all fondant tool set users.


Monday, May 21, 2012

Tip of the week - Icing Bullet

For me, the worst part about baking and cake decorating is the cleaning. I hate to use the dishwasher for all the cake deco items and so I end up with almost an hour of cleaning the mess that I created! So when I got to know this tip from a friend, I was excited and so sharing on the tip to all others in the baking world!

This is called an icing bullet which helps to avoid cleaning the icing bags.

Necessary Items:

Icing bag
Couplers
Tips (as needed)
Plastic wrap
Required icing

Steps:

1. Cut the required length of plastic wrap and place it flat on the kitchen counter.

2. Place the icing on the plastic wrap as shown.


3. Roll the plastic wrap over the icing until fully covered.


4. Hold the ends of the wrap and twist it until both the ends are twisted tight. This is called the icing bullet and can also be stored as such in the refrigerator for later use.


5. Insert the coupler on one end of the twisted wrap.


6. Now insert this bullet with the coupler end into the icing bag as shown in the picture below.

7. The extra wrap that comes out through the coupler should be cut and the coupler along with the tips is fitted to the bag.


8. The other end of the wrap is knotted to avoid the icing coming out through this end.


9. The icing bag is now ready for cake decorating. The icing will not touch the bag and so there is no cleaning to be done. Only the coupler and tips will have to be washed.


Hope this tip serves useful to all readers. :) Meet you soon with yet another tip!


Sunday, May 13, 2012

How to test baking powder or soda?

Read this important tip somewhere!
Both baking powder and baking soda can lose their potency over time. So here's a tip to test them for freshness.

Baking powder:
Place a few tablespoons warn water in a small bowl. Add a teaspoon of baking powder. It should fizz and bubble - the more bubbles the better.


Baking soda:
Instead of water, use white vinegar. The baking soda should bubble up and foam.

Hope this helps!


Monday, May 7, 2012

Better Homes and Gardens - May 2012 - Review

Talking of inspirations for cake recipes and decorations, this month surprised me when I found out loads of cake recipes and tips from an unexpected source - "Better Homes and Gardens" magazine!


I loved the colored pictures of the delicious cakes and their recipes.


As I browsed thru this magazine, I also discovered many new tips and tricks that would surely help me past my baking mishaps.
Click on the below link for more details:
BHG.com/cakedecorating 

This issue has been a treasure for all cake artists and I hope BHG publishes more of such articles!

Something to ponder:


Meet you again with yet another informational book review!


Saturday, April 28, 2012

How to: Make a Strawberry Tiramisu

Tiramisu, or "pick me up" is the royal dessert for any meal and one of my favorite desserts! After attempting the alcoholic version, I wanted to try out the non-alcoholic type. So this is my version of the "Strawberry Tiramisu".

Ingredients:

    1 cup strawberries
    1 cup confectioners' sugar
    1 cup mascarpone cheese
    1/2 cup heavy whipped cream
    2 tablespoons milk
    ladyfingers (as needed)
    1 cup chilled espresso(I used the freshly brewed)
    1/2 teaspoon unsweetened cocoa powder

Procedure:
  1. Clean and chop the strawberries and blend these with 1/4 cup of confectioners' sugar. Set aside the blended puree.
  2. Beat the mascarpone cheese, whipped cream, sugar and milk for 2 minutes until the mixture is uniform.
  3. Dip the ladyfingers in the brewed espresso and place them in a cake pan.
  4. Spread the cheese mixture (as in step 2) over the ladyfingers and then with the strawberry puree.
  5. Repeat the above procedure with ladyfingers, cream and the strawberry puree.
  6. Top the layers with the remaining cheese mixture.
  7. Dust cocoa over the completed dessert and serve chilled.

Hope this helps to satisfy your cravings of this fabulous Italian dessert in my style. :)


Wednesday, April 25, 2012

My first floral arrangement with sugar flowers!

Thanks to my new passion of making sugar flowers, I have started looking at cake decorating in a totally different view! The classes that I enrolled this month have helped me so much that I am grateful to the instructors!

And so, here is my first floral arrangement that I have put together. This includes the Open Peony, Hydrangea flowers and buds, Stargazer Lily, Garden Rose, Briar Rose and Filler flowers.


So, what is your favorite sugar flower?


Sunday, April 22, 2012

How to: Make the Open Peony Gum paste flower?

This weekend has been a busy one for me with all sugar flowers in the making! I had been busy making filler flowers (learnt from Jacqueline Butler's Craftsy class) and few more flowers (learnt from Wilton's Advanced gumpaste flowers). But one of the flowers apart from this list is the open Peony which I have fallen in love with!

I had been browsing through many online pages trying to find a tutorial for making this gorgeous flower but failed to find an informative one. Deciding to make one on my own, I started observing flowers from various artists online and incorporated some techniques that made it easy for me to make the peony. So here goes the tutorial which I hope will help all those in love with an open peony.

Necessary Items:

Gum paste (Made pliable by working on it)
Petal craft gum paste cutters - Peony Cutters and Veiners
9" rolling pin
Gum paste storage board
Foam pad
Ball tool
Flower forming cups
26-gauge wire and floral tape
Fuchsia and peach color dusts
Cooling grid (I use this for drying the flowers)
Styrofoam disk
Yellow pointed stamens

Step by step instructions:

1. Use the gum paste of your desired color and work on it to make it really pliable. I found out in my experience that "the more you work on the gum paste, the easier it is to make a realistic flower".

2. Roll out the gum paste on the storage board (on the hard side of the board). Roll it in such a way that the lower portion is thicker. (This enables the wire to be inserted into the petal)

3. Use the peony petal cutter and cut the petal. Note the thickness on the lower side of the petal.


4. Using a foam pad and the peony veiner,  press the cut petal onto the veiner so that the veins are imprinted onto the gum paste petal.


5. Insert a 26 gauge wire through the thick lower portion (to almost 1/2" into the petal). Thin the edges of the petal using the ball tool. Make sure the petal looks natural by this process.
Note: I used green wire and green floral tape since I did not have white. White color would be apt in this case for petals.


6. Cup the center of the petal using the ball tool and the foam pad. Let the petal dry overnight on a flower forming cup.


7. Make around 10-15 petals(as in the previous steps and let them dry overnight.


8. Make three carpels (or pistils) in green color and dust them with fuchsia petal dust on the top portion. Dry these on a styrofoam disk.


9. Use the stamens and the dried carpels and wrap the floral tape around all of them to form the center of the flower.


10. Make the first layer of the flower using four petals and wrap all of them using the floral tape.


11. Use the remaining petals to form the next two layers. Make sure you wrap all the petals firmly and let them set for a while. The petals will be brittle and so extreme care is needed while assembling the flower.

The finished flower:


Hope this tutorial is clear enough. Please leave your comments/ feedback and any questions.


Thursday, April 19, 2012

How to: Bake a cake in microwave convection mode?

So one of the questions that I recently received from my readers is : How to bake a cake in microwave convection mode?

This is something new to me as I have been accustomed to the electric ovens. So after a lot of research, here I am with my findings which I hope will help those with the microwave oven!


What is a microwave convection oven?
A convection microwave is the combination of two kitchen appliances: a convection oven and a microwave. A convection oven is just like a conventional oven except that no heating elements are exposed and the heat generated inside the oven is recirculated by strong fans. This rapidly moving hot air cooks and bakes more evenly and, usually, more quickly than the still air inside conventional ovens.
Convection ovens can offer up to three modes: microwave cooking only, convection cooking only or a combination of the two. Sometimes this is called a "mix" feature.

Cooking food with the convection mode means you can brown, broil, crisp and bake. To speed up cooking times, users use the microwave-only mode to heat through the food, then use the convection-only mode to crisp a pizza's crust or to brown a meat's skin. Like the microwave-only mode, the convection-only mode can cook an entire food item. It will just take a bit longer than using the microwave mode.

Convection microwave ovens that use the microwave mode and the convection oven mode together use the energy of a microwave and power of a convection oven. Food cooks faster, and users enjoy the browning/crisping that results.

Baking a cake using Microwave
A convection oven is almost similar to an electric oven when it comes to baking a cake. The Convection feature in the Microwave enables the features of a regular oven when you choose the option. In simple terms,when you set the temperature of the oven in Convection mode, the Microwave literally transforms itself into a regular baking oven.

Type of Baking utensil to be used in the oven
When the convection mode of the microwave is activated, you have to use metal/aluminium/non-stick pans the same as you would use in a regular oven. However,some ovens have combination cooking modes like Microwave-Grill or Microwave-Convection, Here you have to use Pyrex/Borosil utensils as they are safe for Microwave as well as Convection/grill mode.

Pre-heating in a microwave
Some recipes ask for preheating of the oven for few minutes.But in Microwave,it works differently. In electric oven,after the set time,the oven beeps and you could continue with the recipe.But in microwave convection ovens,you do not have to set any time,just set the temperature you would want to bake the stuff and press start. For example,if the recipe requires 180C heat,set that temperature and press start.The microwave would start preheating and beep when it is of the required temperature and it usually takes only 3-4 minutes.

Can a microwave be preheated empty?
When you are using the Convection mode,the microwave ceases to be one and becomes like an electric oven.So there is absolutely no problem if you run it empty.In solo microwave mode,it should not be used if it is empty.

Can I use a microwave immediately after baking a cake?
No,you shouldn’t use the oven in microwave mode after baking a cake.The reason being,the oven would be quite hot after baking and if you use the microwave mode with micro proof utensils, there is a risk of the food as well as the utensils getting burnt.

How to set the temperature for baking in Convection mode?
In most Microwave[Convection] ovens, there is a button which says Convection and when you press that,it displays temperatures starting from 110C to 200C as and when you press it.If you want to bake in 180C,stop pressing when it reaches 180C and press start. It will start preheating and will beep when it finishes preheating-usually after 3-4 minutes. At this stage,you can open the oven and put the stuff inside for baking and again start from setting the temperature.Enter the time you want it to be baked and it starts baking!!

Can I use Aluminum Foil in my Microwave?
Aluminum foil should[ideally] not be used in Microwave and Convection mode as there is a risk of burning. However,in grill mode,you could use a minimal amount,ie place it below the grill plate/tray to collect drippings etc, but not more than that and not anywhere near the heating coil.There are some cake recipes calling for covering with foil after a few minutes. But do it at your own risk.

Do Cakes/Baked stuff prepared in Microwave taste as good as those baked in electric oven?
This is something that my readers have to let me know since I am new to microwave baking! :)

Specific tips for Samsung CE104VD:

* Do not cook using the combination setting. If so the cake will be hard due to increased microwave energy. Reduce the microwave energy on the Samsung unit when using the combination setting.

All the above information are solely from research done online and not from personal experience. Would be adding more info as and when I find something new related to this topic. Would also love to hear from readers who use convection mode for baking cakes.

Happy Baking!


How to: Bake a "Perfectly Chocolate" chocolate cake

One of the cakes that I have tried to master and succeeded in it is the chocolate cake. Inspired by the Hershey's "Perfectly Chocolate" Chocolate cake, I have tried this quite a few times now and have loved the taste!

The Hershey’s “Perfectly Chocolate” Chocolate Cake is a delicious chocolate cake which is chocolatey, rich and moist and is a perfect start for beginners. It is so easy to make and demands just a little less than an hour for preparation and cooling! And it will surely make you wonder why you have been searching around for good chocolate cake recipes!

So here goes:

Adapted from Hershey's back of the Box recipe:

Ingredients:

2 cups sugar (I use 10x ground)
3/4 cup all-purpose flour
3/4 cup Hershey’s cocoa
1/4 teaspoons baking powder
1/4 teaspoons baking soda
1 teaspoon salt
2 large eggs
1 cup milk (Even 2% works fine for me)
1/2 cup canola oil( I usually omit this and there is not much difference in the taste)
2 teaspoons vanilla extract
1 cup boiling water

Directions:

1. Heat oven to 350°F. Grease and flour two 9-inch round cake pans. Set aside.

2. Stir together sugar, flour, cocoa, baking powder, baking soda and salt in a large bowl. Add eggs, milk, oil and vanilla; With a mixer, beat on medium speed for about 2 minutes. Carefully, stir in boiling water. The batter will be very thin. Pour batter into prepared cake pans.

3. Bake for 30 to 35 minutes or until a toothpick inserted in center comes out clean. Cool 10 minutes; remove from pans to wire racks. Cool completely. Frost with chocolate frosting.

10 to 12 servings.

Perfectly Chocolate Chocolate Frosting

1/2 cup (1 stick) butter or margarine
2/3 cup Hershey’s Cocoa
3 cups powdered sugar
1/3 cup milk
1 teaspoon vanilla extract

Melt butter. Stir in cocoa. Alternately add powdered sugar and milk, beating to spreading consistency.
Add small amount additional milk, if needed. Stir in vanilla. About 2 cups frosting.


Tips:

* Do not forget to tap the pan once or twice to get rid of the air bubbles.

* I use the Bake even strips from Wilton to get the cake to bake evenly throughout!

* Cool the cake completely before icing it.

* Cocoa has a drying effect on cake batters, causing them to bake more quickly. Be cautious. Get to know your oven, whether it under- or overbakes. Use a kitchen timer or write down the exact time the cake went in the oven. A dry chocolate cake will not taste as delicious as a moist chocolate cake.

* You cant be sure if your cake is done just by visually seeing it. With the chocolatey color of the cake, there is no good tip to find it if it is perfectly baked just by the sight of it. You will need to press lightly with your finger to test the done-ness. The cake should spring back in this case which indicates that the baking is complete!

Happy Baking!


Wednesday, April 18, 2012

American Cake decorating magazine - Free sample!

For all cake decorating enthusiasts, this is an offer you would not want to miss! I recently found out about this magazine and have already subscribed! This has a wealth of knowledge and many more interesting ideas for cake decorating!

"American Cake decorating Magazine is a bi-monthly national publication bringing new ideas, techniques and inspirations. Each issue features step-by-step tutorials, themed showcases, new product information and more."

If you are still skeptical,  try out the free issue before you actually subscribe.


https://americancake.magcs.com/ebfi12/freetrial

Disclaimer: This is just a promo that I received in my email and wanted to share with my readers! Sweet Delights is in no way affiliated with this promotion!


Monday, April 16, 2012

Work in Progress!

The advanced gum paste flowers have suddenly increased my love in using gum paste itself!
Initially, gum paste and anything to do with gum paste were not on my mind. Somehow I did not like the texture and managing gum paste was such a herculean task! Anyways, the decor and freshness that these flowers add to the cake made me fall in love.

So here goes my work in progress: the briar rose, stargazer lily petals and leaves, ivy leaves.


Yet to dust and glaze them before I start off with the rest of the flowers that I intend to add to this bouquet.


Thursday, April 12, 2012

So whats's your question?

In the recent past, I have been receiving questions from my friends about baking techniques. I try to answer them from my own learning. But some of them have been new to me. I have started browsing more and researching on those topics thereby increasing my knowledge too. Thanks to all those who trust my experience in baking!


So for all those intrigued with baking, decorations and anything related to cakes, feel free to post them here on SWEET DELIGHTS or email them to me @ shivssweetdelights@gmail.com

I will try my best to answer your questions either thru researching online or thru the successes and failures in my experience.

Lets learn together!


Wednesday, April 11, 2012

How To : Bake a Soft and Moist Yellow Cake

For a baker, the most difficult recipe to achieve is the basic yellow cake. Any beginner would know the difficulty in NOT making a dry cake that tastes something like corn bread. I had almost abandoned the idea of making yellow cakes at home until I found this cake recipe which I modified as per my needs.This turned out a lot better than the yellow cake that I used to make in my initial days of baking!

Moist Yellow Cake

Ingredients:
1 cup of unsalted butter
2 cups of 10x finely ground sugar
4 eggs
3 cups of all purpose flour
1 cup of milk
1 teaspoon pure vanilla extract
1/2 teaspoon of (no color) butter extract

Procedure:
  1. Preheat oven to 350 degrees.
  2. Grease and flour two 8 inch cake pans.
  3. Cream butter until it becomes super soft.
  4. Add sugar and continue to cream the mixture.
  5. Add the eggs and beat all the ingredients until they are thoroughly mixed.
  6. Add the all purpose flour and milk (alternating to creamed mixture), beginning and ending with flour.
  7. Add vanilla and butter flavoring to mix.
  8. Divide batter equally and pour into the cake pans.
  9. Bake for 25 – 30 minutes until a toothpick comes out clean when inserted.
  10. Cool in pans for 5 – 10 minutes.
Tips:
  • After pouring the batter into the pans, carefully drop the pans flat onto counter several times to ensure release of any air bubbles. This will help you have a more level cake.   
  • Once the cake is cooled in the pan, remove and immediately wrap each layer in plastic wrap to seal in moisture. Cool completely on wire racks. 
  • Do not use salted butter which gives the taste of corn bread to the cake.
  • More butter makes the cake ultra soft but with additional calories.
  • Adding 1/3 of a cup of vegetable oil also helps.
      Additional tip for moistness:
  • Combine 1 cup of sugar and 2 cups of water.
  • Bring to boil and boil for approximately 3 minutes. Let cool.
  • Pour liquid into a spray bottle.
  • Unwrap first layer and if needed, level off the top of your cake.
  • Place layer onto your dish. Take a straw and poke holes into the layer. Using your spray bottle, spray top of layer several times; enough to give it a little moisture. Be careful – Do not add too much.
  • Add a layer of desired frosting to your bottom layer. Repeat on second and third layers.
  • Frost the sides.
Do try this and let me know how it turned. If it indeed turned out MOIST!


Tuesday, April 10, 2012

Choco cake balls with leftover cake.

Saturday evening was a busy time with brother's birthday coming up the next day. I was all set to make the roll cake with ice cream filling. But that ultimately turned out to be a whole mess with the roll totally crumbling. The crumbled cake was that which was left over. (A post on "how to make a roll cake" coming soon.) The taste was exactly what I had intended it to be, but not the crumbles! :(

So now, all I had was excess of cake leftovers and cake ganache left over from the previous cake. I crumbled the moist chocolate cake further more and started making cake balls. The cake balls placed on wax paper was left in the freezer for an hour or so. Then these cake balls were dipped in the chocolate ganache and left to freeze for another hour. And so the cake mess turned out to be tasty cake balls.


Tip: Additional decoration done using leftover buttercream icing.


Saturday, April 7, 2012

Spring Time @ Sweet Delights!

Sneak Preview! One of many more to come! 

Gerbera Daisy


Thursday, April 5, 2012

Tip of the Week - Open star Tips

For a cake decorator, one of the most important tools is the icing tip that creates art on the delicious cake. But having so many tips and remembering the designs each one carves is a daunting task. Atleast for people like me!

The star tip is one of my favourite ones. #18 is one tip that I use often on my cakes. I like the pattern and the variations that it makes.

Tip of the week:
#13, #14, #15, #16, #17, #18, #19, #20, #21, #22, #32, #199, #362, #363, #364, #172, #2110, #4B, #6B, #8B

Here are few of the tips that I own that can be used for a star pattern in different sizes.


And below are some of the patterns made using star tips.

Star

Shell

Crown Border

Reverse Shell

Fleur de Lis

Rope

Rosette

E-Motion

C-Motion

Horizontal - C

Pattern Press

Zigzag

Zigzag Puff

Zigzag garland

Flute


Hope you discover more new star patterns! Have fun!


Related Posts Plugin for WordPress, Blogger...